This post is very basic level CSS implementation. I want to explain how to design tab style login and registration panel with CSS, HTML, and Jquery. Tab system helps you to save page space, Just take a quick look at these four steps, use it and enrich your web projects.
Step 1
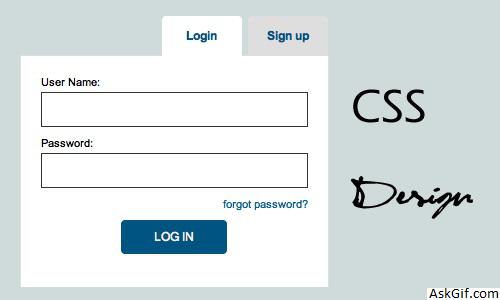
Layout divided into three horizontal parts is Container, Tabbox, and Panel. Here Container is the parent div.
HTML Code
<div id="container">
<div id="tabbox"></div>
<div id="panel"></div>
</div>
CSS Code
#container
{
width:350px
}
#tabbox
{
height:40px
}
#panel
{
background-color:#FFF;
height:300px;
}
Step 2
Tab box div divided into two vertical parts called tabs are Login and Signup
HTML Code
<div id="tabbox">
<a href="#" id="signup" class="tab signup">Signup</a>
<a href="#" id="login" class="tab select">Login</a>
</div>CSS Code
Contains CSS3 code for round corners. Here signup class for margin-left 8px it allots gap between login and signup tabs.
.tab
{
background: #dedede;display: block;height: 40px;
line-height: 40px;text-align: center;
width: 80px;float: right;font-weight: bold;
-webkit-border-top-left-radius: 4px;
-webkit-border-top-right-radius: 4px;
-moz-border-radius: 4px 4px 0px 0px;
}
a
{
color: #000;
margin: 0;
padding: 0;
text-decoration: none;
}
.signup
{
margin-left:8px;
}
.select
{
background-color:#FFF;
}
Step 3
Now Panel div divided into two horizontal parts are Loginbox and Signupbox. By default Signupbox display none.
HTML Code
<div id="panel">
<div id="loginbox">Login Form</div>
<div id="signupbox">Signup Form</div>
</div>CSS Code
#loginbox
{
min-height:200px;
padding:10px;
}
#signupbox
{
min-height:200px;
padding:10px;
display:none;
}
Step 4
Handling DOM objects with Javascript.
Javascript Code
$(".tab").click(function(){})- tab is the class name of anchor tag. Using $(this).attr('id') - calling the anchor tag ID value.
<script type="text/javascript" src="http://ajax.googleapis.com/
ajax/libs/jquery/1.5/jquery.min.js"></script>
<script type="text/javascript">
$(document).ready(function()
{

$(".tab").click(function()
{
var X=$(this).attr('id');

if(X=='signup')
{
$("#login").removeClass('select');
$("#signup").addClass('select');
$("#loginbox").slideUp();
$("#signupbox").slideDown();
}
else
{
$("#signup").removeClass('select');
$("#login").addClass('select');
$("#signupbox").slideUp();
$("#loginbox").slideDown();
}

});

});
</script>

