ASP.NET Web API is a fantastic piece of the .NET family (there is certainly some weirdness since we now have MVC and Web API with nearly identical methods, but ASP.NET MVC 6 is coming :)). However, getting a SPA or mobile hybrid (Ionic!) app working isn’t the most pleasant experience.
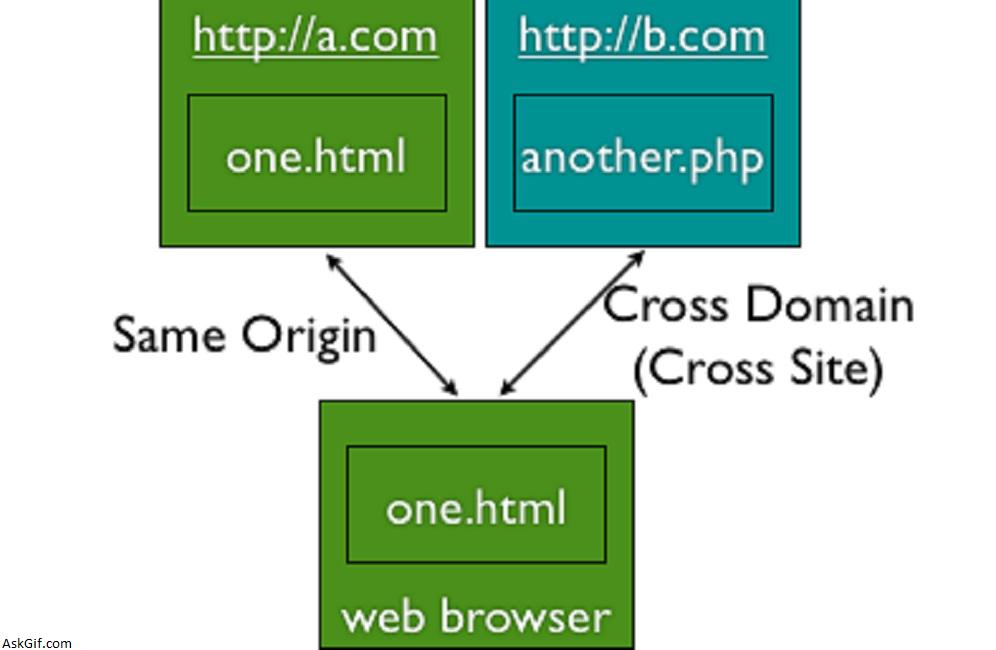
Allowing Cross-Origin Requests
So if you tried hitting the API without some setup, you’ll notice your pre-flight OPTIONS request failed. This is happening because the browser wants to send a request BEFORE your request to make sure you’re allowed to make your request.
First things first, we need some packages. I had versions 3.0.1 and 5.0.0 respectively when writing this.
Install-Package Microsoft.Owin.Cors
Install-Package Microsoft.AspNet.Cors
Secondly, find /AppStart/Startup.Auth.cs and update the ConfigureAuth method to include the UseCors method as follows:
public void ConfigureAuth(IAppBuilder app)
{
 app.UseCors(Microsoft.Owin.Cors.CorsOptions.AllowAll);

 // creates owin contexts and stuff
}
This will allow you to make requests from a different server.
Setting up the requests for registering and logging in
Register user
To make a request to create a user, you want to send the following JSON to /api/account/register (if you’re using default Identity routes):
var registrationData = {
 UserName: userName,
 Password: password,
 ConfirmPassword: confirmPassword
};
Login user
To make a request to log in a user, you want to send the following JSON to /token with the following JSON:
var loginData = {
 UserName: userName,
 Password: password,
 grant_type: password
};
This may seem a little odd. We don’t have a TokenController! What’s it hitting? Well, if you go back to your /App_Start/Startup.Auth.cs file, you will see the following:
/ Configure the application for OAuth based flow
PublicClientId = "self";
OAuthOptions = new OAuthAuthorizationServerOptions
{
 TokenEndpointPath = new PathString("/Token"),
 Provider = new ApplicationOAuthProvider(PublicClientId),
 AuthorizeEndpointPath = new PathString("/api/Account/ExternalLogin"),
 AccessTokenExpireTimeSpan = TimeSpan.FromDays(14),
 AllowInsecureHttp = true
};

// Enable the application to use bearer tokens to authenticate users
app.UseOAuthBearerTokens(OAuthOptions);
This code configures the /token response.
Sending requests for API endpoints with [Authorize]
When you make the request to log in, you will receive an “access_token” in the response. You’ll need to hang on to this value, and send it as an ‘Authorization’ header, like so (if you’re using Angular):
$http.defaults.headers.common['Authorization'] = "Bearer " + authentication.access_token;Now all of your requests will send over this Authorization header, so when Identity authenticates the request, it will set your static User object to your user!
All done!
This is the workflow for hitting an API cross-origin and authenticating requests. You’ll hit the /token URL to get your bearer token and add it to all subsequent requests requiring authorization.
Using AngularJS?
If you’re using Angular or Ionic Framework, I’ve posted a Gist providing some of the workflows explained above for registering, logging in, and making authorized requests. But be warned – it’s not perfect. You may have to do some clean-up. If you do, please let me know. In the meantime, I will try to refactor it into something nice and pretty.


